“#HappyInSchool” is a project and
exhibition that works with grade eight learners in seven secondary schools in
Umlazi, KwaMashu, Verulam and
Tongaat, Durban. The project engages with these learners by partnering
with educational NGO OneVoiceSA.
(OVSA). Central to the exhibition is the question “What will make me
happy in the future?” Through a series of participatory workshops the learners
and OVSA facilitators explore visualisations of a ‘happy’ future through the
technique of image theatre. Groups of learners create dramatized images using
improvised props and costumes to depict their dreams and aspirations.
PROJECT AIM
The
project sets out to highlight the importance of young people having a voice as
an instrument for change; and a means to explore issues of human rights, gender
equity, cultural diversity and specifically, nation building. In all of the
workshops and activities, young people’s practice of rights and
responsibilities is highlighted to support them in becoming active participants
in the realisation of these rights. Young people need to be recognised as
active rights holders, who have the capacity to become full and responsible
citizens. Youth engagement on health and lifestyle issues,
now and in the future, is vitally important for South Africa at this stage
in its democracy.
Project
Objectives:
- To promote
meaningful participation and transformation by young people
in making informed decisions about their health, lifestyles and rights
within their communities; as well as playing a meaningful
role in educating their peers on their rights and responsibilities.
- To provide a platform for young people
that supports the activation of their voices and
addresses their concerns, so that they can lead by example; investing in
the next generation, who in turn, will be skilled and able to support
sustainable change over time (incubation).
- To support young people on being heard and having their words advocate, influence and shape their futures, and those of their peers.
Photography
Project
The Happy in School Photography
Project involves learners creating images of what they think their own happy
futures might look like, and these images being captured by a photographer. The project has three
processes:
1: A workshop with learners that
focuses on their idea of happiness and envisioning their future happiness.
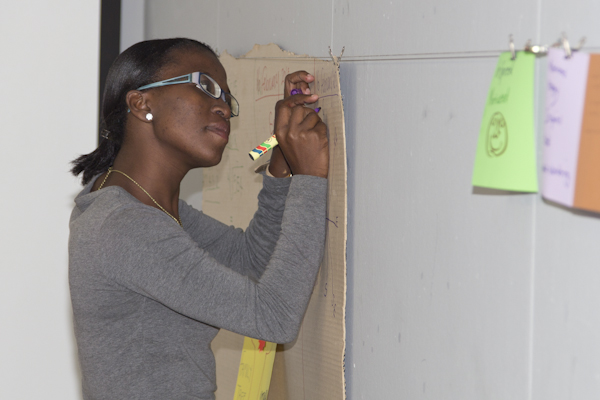
2: A workshop with learners preparing for a
photo shoot that captures images of their imagined happy future.
3: A photoshoot with the
learners.

Workshop One
Purpose of the workshop: To
encourage learners to think about what makes them happy now, and what they
think would make them happy in the future.
Workshop duration: 45
minutes.
Workshop objectives:
·
Learners will identify what makes them happy.
·
Learners will imagine what career or situation
might make them happy in ten years time.
·
Learners will translate these ideas into goals
for themselves.
·
Learners will identify steps to help them reach
their goals.
·
Learners will reflect on how this activity has
made them feel.
Resources required:
·
CD player / cell-phone with speakers.
·
A download of the song “Happy” by Pharrel
Williams.
·
Paper and pens for each learner to write down
their goals.
·
Coloured paper squares for learners to use for
the reflection exercise.
Workshop process:
Step 1: Introduction and warm-up (10 minutes)
1: Introduce the workshop by
explaining that in this session you will be focusing on happiness and for each
person to think about their own future happiness and setting goals to reach
that happy future.
2: If it is possible, ask the learners to come
together at the front of the room to make a circle. If not, then they will stand behind their
desks for this exercise. Explain that
you will play a song, and that everybody should respond with their bodies to
how the song makes them feel. They can move and dance around however they want
to.
3: Ask the learners to close
their eyes, or turn away from each other in the circle. Play the song “Happy” by Pharrel Williams on
your cell-phone or CD player. Make sure
it is loud enough for everybody to hear.
4: When the song is finished,
invite learners to say how they feel.
Not every person needs to comment; only those who wish to say something.
5: Point out to the group that
one of the lines in the song says “Clap along if you know what happiness is to
you”. Say that for every individual, the
things that make us happy are unique.
Ask the learners to speak to the person next to them and to tell them
what makes them happy.
Step 2: Group work (20 minutes)
1: Divide the class so that
learners are in groups of four or five people.
2: Explain to the group that what
makes us happy now might be different in the future. Ask them to talk in their group about what
each person sees themselves doing in ten years time, what work or career they
think will make them happy.
3: Give the group five minutes to talk, and then
explain that you would like them to create images that show what job they
imagine they will be doing that makes them happy. Explain that these images should
be still, like a photograph, and there should be no moving or talking in the
image.
4: Allows the groups just five
minutes to discuss this and to practice making these images. They should have an image in mind for each
person in the group.
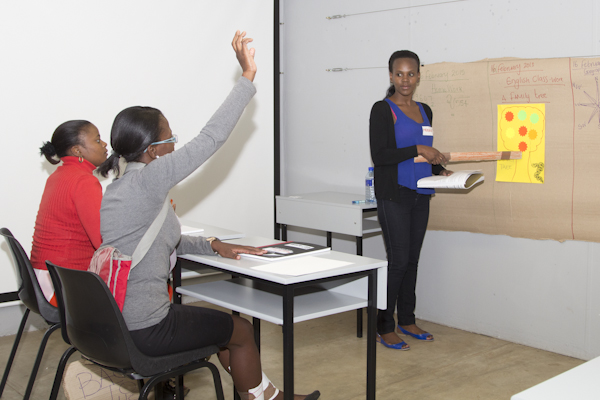
5: In turn, ask each group to
come to the front of the room to show the images. This will be like a photographic exhibition,
where the rest of the class looks at the images they have created and
interprets them. Explain that you will count them down, counting 5,4,3,2,1...
and they should then freeze in the image.
They should remain frozen in that image while the rest of the class
guesses what they are doing. Allow ten
minutes for this “showing” of the images.
If the group is very big, then not every person will show their image.
Step 3: Individual work (10 minutes)
1: Explain to the class that
having dreams for our own happy futures is important. However, we need to have a plan to reach
these goals, so they are not just dreams, but are a realistic future that we
can aim for.
2: Give each learner a piece of
paper and pen and ask them to write down the steps that they think they need to
take to reach these future career goals for themselves.
3: Remind the learners that we
each have our own journeys, and if we want to reach our goals we need to plan
ahead and know what steps to take to reach these goals. Remind them that sometimes we might get
distracted from our goals, but writing them down and sharing them with people
we trust can help us to keep focused and get the support we need to make the
best decisions to reach these goals.
4: If time allows, learners can
share the steps they have set to reach their goals with each other, or with the
whole class.
Step 4: Reflection and closure (5 minutes)
1: Give each learner a coloured
square of paper and pen and ask them to write down a few words or make a quick
drawing of how they feel after doing this exercise.
2: Explain that One Voice is
working on a project that encourages young people to imagine their own happy
futures, and explain that their class has been chosen to participate in a
project that photographs learners for an exhibition of photos that shows what
they imagine their own futures to be like.
Explain to the learners that they will start to prepare for these
photographs in the next session.
3: Also explain that you will be
collecting the coloured squares for use in the exhibition and for reporting on
the project.
Workshop Two
Purpose of the workshop: To
prepare learners for the photo shoot for the exhibition.
Workshop duration: 45
minutes.
Workshop objectives:
·
Learners will make decisions about who will be
photographed for the exhibition.
·
Learners will create props and costumes for use
in the photo shoot.
·
Learners will reflect on how this activity has
made them feel.
Resources required:
·
Large sheets of paper.
·
Coloured pens and paints.
·
Scissors and tape.
·
At least 10 pictures from magazines that show
‘sets’ for photo-shoots.
·
Coloured paper squares for learners to use for
the reflection exercise.
Workshop process:
Step 1: Introduction and warm-up (10 minutes)
1: Introduce the workshop by
reminding learners that in the previous workshop we focused on imagining a
happy future for ourselves. Explain that
in this workshop we will continue to think about our futures, and will start to
prepare for the photo shoot.
2: If it is possible, ask the learners to come
together at the front of the room to make a circle. If not, then they will stand behind their desks
for this exercise.
3: Start a rhythm, with
words:
×
Hey Jingle, (They
repeat after you)
×
Do you jingle? (They
repeat after you)
×
Hey Jingle, (They
repeat after you)
×
Do you jingle? (They
repeat after you)
×
And this is how I jingle... (You do a movement)
×
And this is how I jingle... (They copy your movement)
After a few rounds of this, ask
the learners to connect a movement with their chosen future/career that they
talked about last week. Each learner
then takes a chance to show us “how they jingle” with a movement associated
with their dream job that will make them happy.
Step 2: Group work (30 minutes)
1: Divide the class so that
learners are in groups that are related to what they have seen themselves doing
in ten years time.
2: Explain to the groups that
they need to consider how they might set up a photograph that shows them as
they might look in their future. Pass
around the sample photographs so that they can take a look at these. Talk about what they see in these photographs,
how colour and composition is as important as the model. The background, set and props all tell a
story that allow the viewer to get a clearer picture of the life of the person
in the photo.
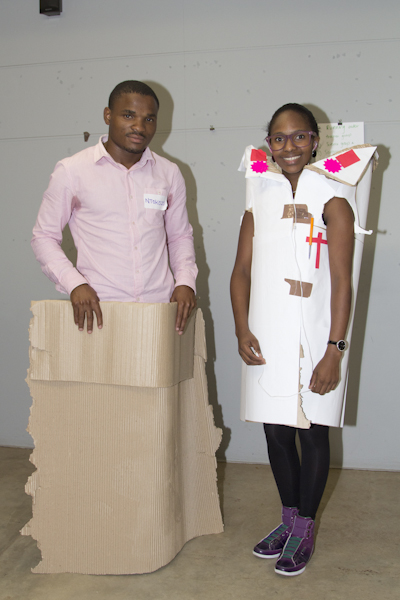
3: Explain to the groups that they will be
responsible for creating these sets, props and costumes for the photo shoot
that will take place, and that they will start to build these today. Ask the groups to decide who will be in the
photos. Will these be individual
portraits or group photos? Not every
person needs to be in the photos, some may prefer to help build the props and
costumes. Each group will need to talk
and make decisions about what set (background), costume or props they want to
use to show who they want to be.
4: Give the groups materials to
start to create the look that they want for their photos. Explain that they can also use objects that
they find around the school (or home) for the shoot. Stress that they should not buy anything for this.
5: Walk around the room and give
assistance where needed. Remind the
groups of the importance of colour and composition, that their images must be
clear to an outside viewer, and should be interesting to look at.
6: After 30 minutes, explain to
the group that they will need to continue creating their sets, props and
costumes on their own, and that these should be ready by your next visit.
Step 3: Reflection and closure (5 minutes)
1: Give each learner a coloured
square of paper and pen and ask them to write down a few words or make a quick
drawing of how they feel after doing this exercise. Explain that these squares will be collected
and used as part of the exhibition.
2: Explain that the official
project photographer will be visiting the school in the next session, and that
they should be ready to be photographed.
The Photo Shoot
A time and venue need to be
agreed on with the school. It is better that an outdoor venue is used, but
there should be an indoor venue available in case of rain on the day. The main set-up place needs to be a bit away
from the buildings, in full sun – not under a tree or under a roof, as shadows
will affect the photos.
Before the photo-shoot:
Learners will need to be reminded
about bringing what they need to the photo shoot the day before the shoot.
You will need to develop a
running order for the photo-shoot. A
running order is a list of what will happen and in what order. This might look as follows:
Setup 1: Group shot of the scientists group
Setup 2: Individual photos of the scientists
Setup 3: Group shot of the teacher groups
Setup 4: Individual photos of the scientists
Setup 5: Group shot of the mothers
Setup 6: Individual photos of the mothers
Setup 7: Placard photos of
individuals.
Process on the day:
On the day of the photshoot – you
could ask some of the learners to help as your assistants, helping set up the
scenes needed, and lining up the next group required in the running order.
On the day of the shoot, make sure that you have thick black marker
pens and enough white card for each person to write the answer to the
question: “What will make me happy in
the future”. They should not write the
question, just the answer ... Eg: “Having a BMW” or “Being a doctor”. They might be photographed with these
placards. The placards will be collected
and used in the exhibition.