Monday 31 August 2015

The more you know the more you see: David Goldblatt


Photo Credit: Mandisa Buthelezi

This is a Visual Literacy learning module compiled by Durban Centre for Photography (DCP) and osmosisliza, using David Goldblatt's exhibition “Structures of Dominion and Democracy” as a case study.  This blog post is aimed at improving your skills for reading a photograph (decode), so that you can better understand how to make (encode) a photograph. 


 In this Visual Literacy module we will use 6 of David Goldblatt's (DG) photographs for your Visual Literacy exercises, guided through 4 steps.


 STEP 1:  
Framing your subjective response for reading photographs through an interview that asks:


 What is your Social, Political and Cultural identity?

Before you make the time and read these photographs through a subjective response to position yourself in the frame, do the following group activity.  In this  group activity you will be interviewed and your responses will be presented to the entire group through the "eyes" of the interviewer.  To start analyzing, describing and interpreting a photograph, it is important that you draw from your own personal perspective and social, political and cultural framework of knowledge. With this activity it is intended that you will  find out more about what you know about your Social + Political + Cultural Identity values, through others. 

Here is a pertinent quote to consider by David Goldblatt"In the belief that in what we build we express much about what we value, I have looked at South African structures as declarations of our value systems, our ethos".

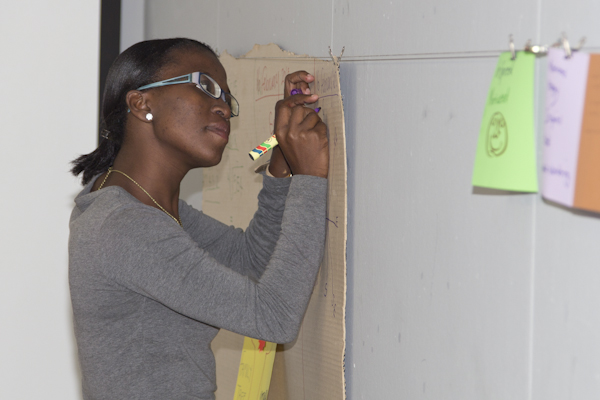
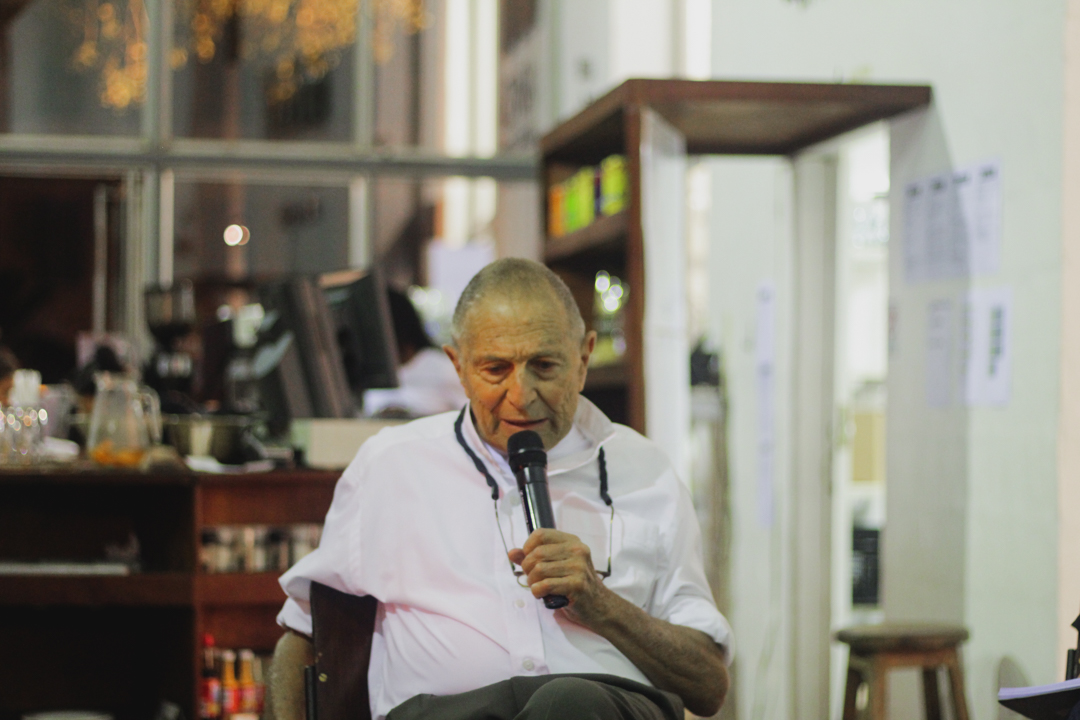
David Golblatt by Mandisa Buthelezi

 
(i) Interview (10 minutes per person)

Pair up with a learner. You will interview each other.  The interviewer can use the questions below to help the interviewee unpack their “Social + Political + Cultural  ID.   The interviewee is required to articulate their personal perspectives through experiences, thoughts, opinions, curiosities and observations had from present and past experiences. Whilst interviewing it is important to make handwritten notes about the conversations had.
• Who are the people/community you associate yourself with? Why?
•  What excites and concerns you about society today? Why?
•  What excites and concerns you about historical circumstances today? Why?
• What are the cultural practices that influence your life today?
• Why do they matter to you?
• How does your way of being relate to others for society to progress? 
• What are you doing to make change? 

(ii) Report back to the group (5 minutes per person in the group) 
Each interviewer will now report back to the entire group what they 'heard' and wrote down. After this presentation allow the interviewee to agree, expand and disagree with the way the interviewer interpreted their statements.
  
(iii) Summary of parts to make a whole (10 minutes)  
The facilitator opens the floor for discussion as the group identifies "sameness" and "difference" amoungst learners.  What are the social, political and cultural differences and similarities that bind and separate us?   


STEP 2:
 Reading photographs through a subjective response...You as mirror and reflection.

How is your social + political + cultural ID "mirrored or reflected" in the photographs?  Use the conversational and personal perspectives 'discovered' above to read the photographs below through the following questions:

What do you see in the photograph? (Name and describe the objects, people, landscapes etc).
• What does what you see in the photograph mean to you?
• What emotions or memories are provoked?
Where are your eyes drawn to in the photograph? What stands out? Why?
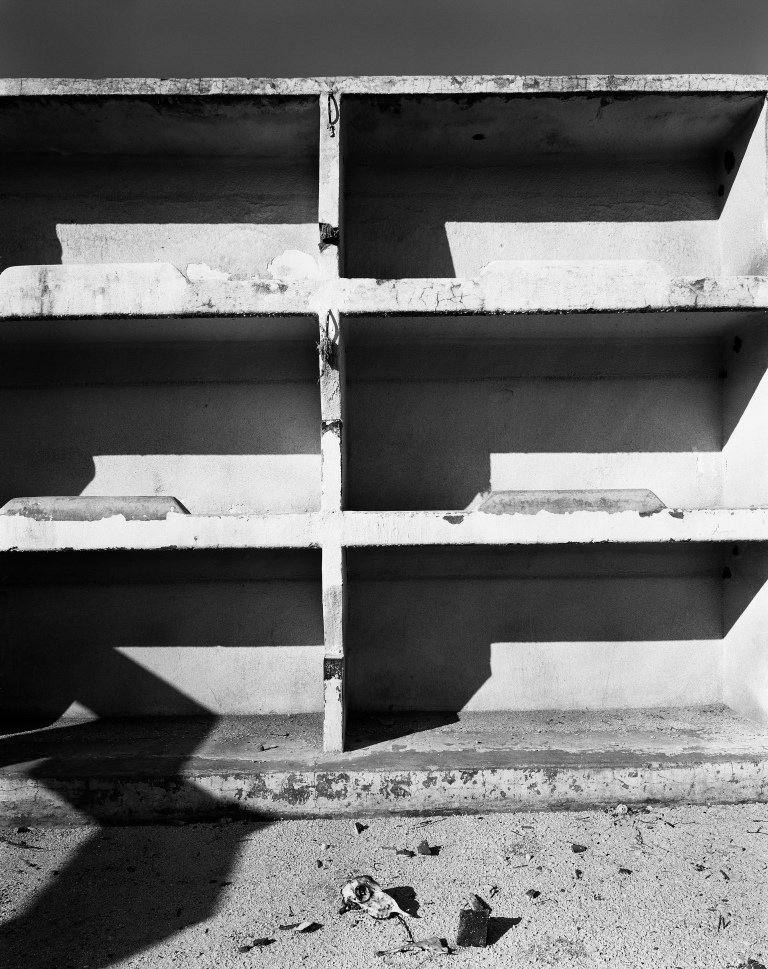
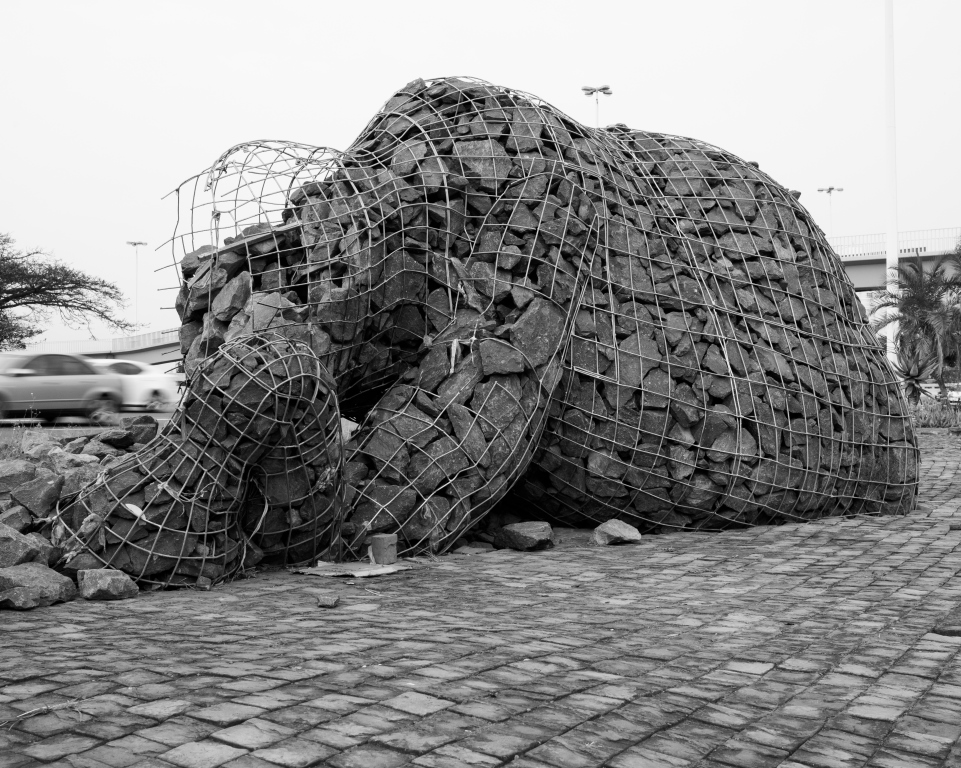
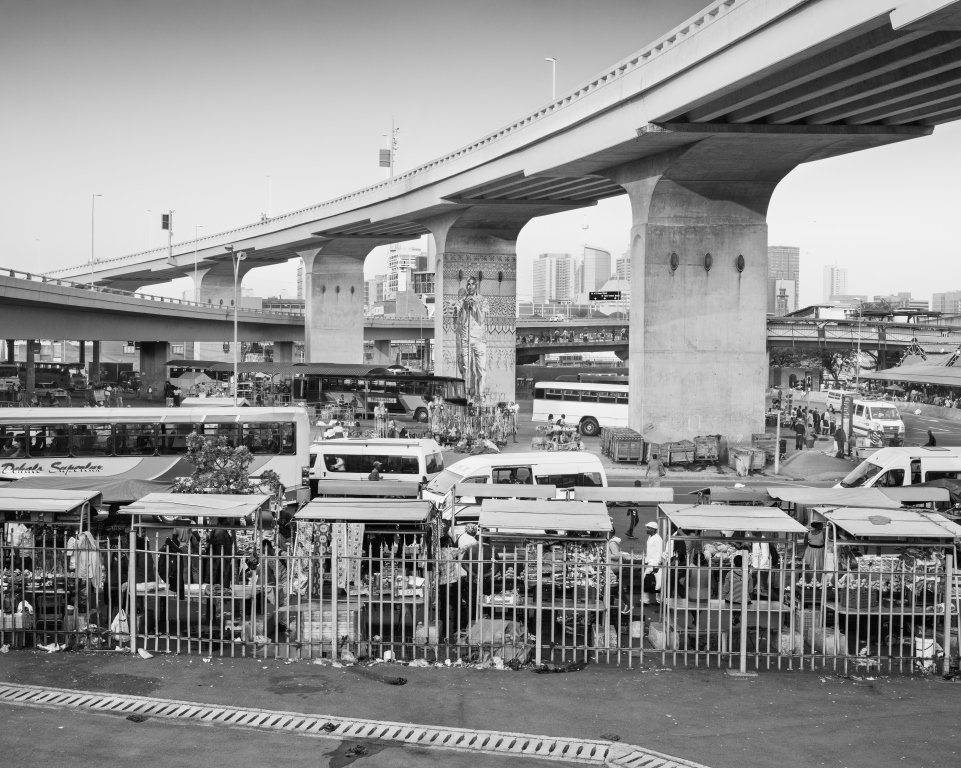
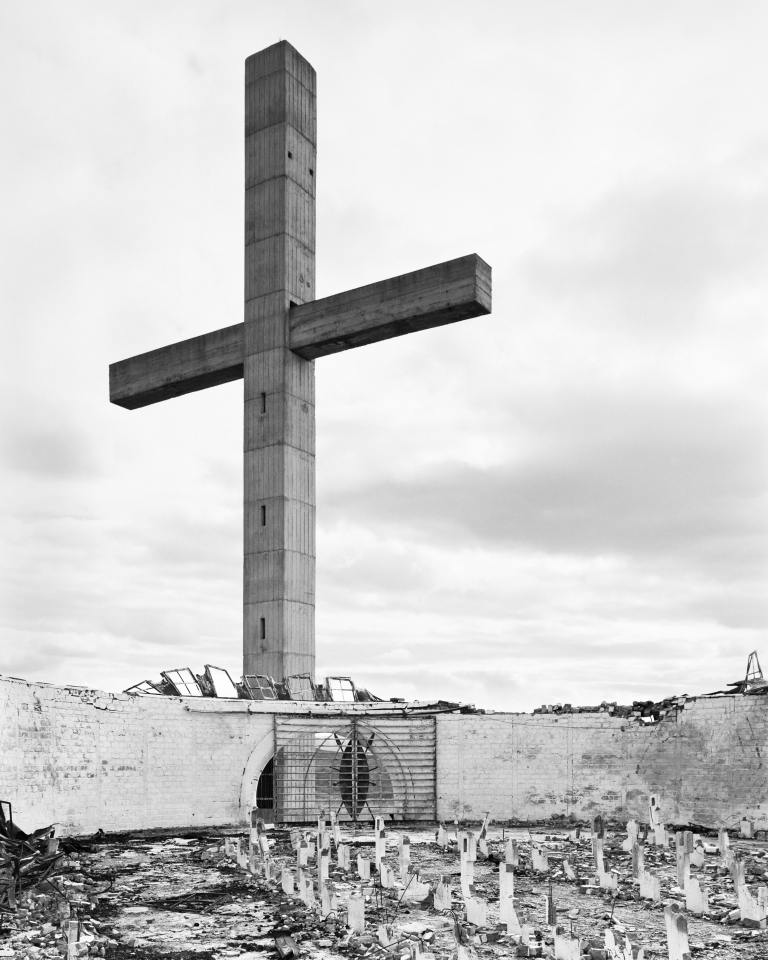
 photograph_1

photograph_2


  photograph_3

  
photograph_4


 photograph_5
 
  photograph_6


Ask yourself:
 "Do I need more information and facts know more, so I can see more...? Where can I find them? 


STEP 3: 
 Context  - the photographer and the place

Peter McKenzie (Curator) writes about the exhibition: "This kind of art entails a priori of understanding of certain political acts which justify the image as art... We live in the landscape of apartheid, both part and apart. As much as we are blinkered to the illusion of a past through the deeply divided experience of SA’s.  Socially Politically and culturally the past like a spectre reaches into the present and in its long reach debilitates all attempts at any kind of the illusive notion of social cohesion. "
 
(i) Read DG's artist statement and the KZNSA exhibition statement here.
(ii) Have you Googled David Goldblatt? 


Here are some links to find out more about DG's history and personal perspective as a photographer, as well as other writings on this body of work: "Structures of Dominion and Democracy" :


Here are some pdf's to download.


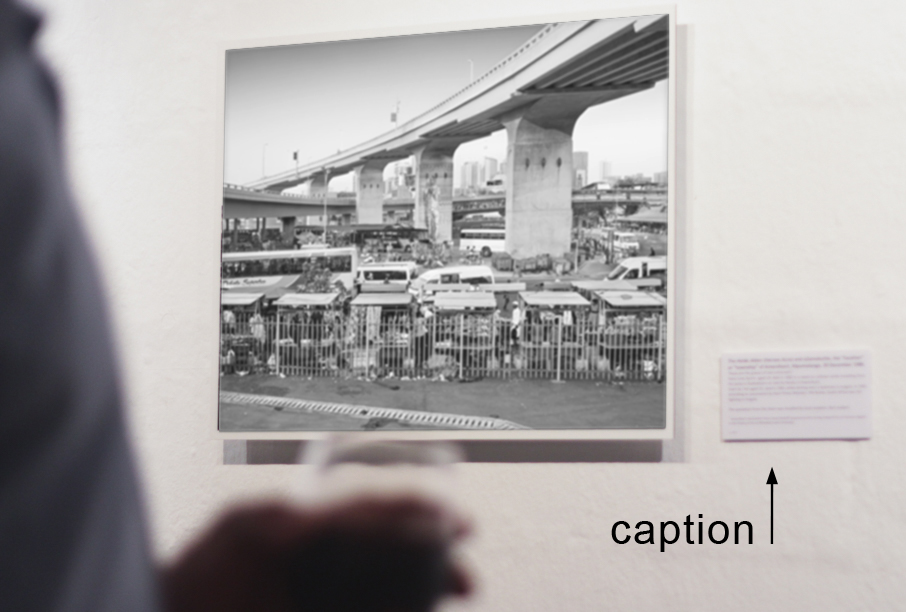
(iii) Captions: The written text that explains the "Who, When, Where..."  Captions are informative text that sit below the image and give the photograph a context to allow the viewer to get a better understanding of how the contents in the photo relate to an event, a place, a person, a history or a incident. Most captions draw attention to something in the image that is not obvious, such as its relevance to the text. The caption for each photograph offers information we would not otherwise know from viewing the photograph.


Ask yourself:
• How do these new details impact the way you look at the photograph?
• How does the caption inform the photograph?
  
(Iv) Title of the exhibition: "Structures of Dominion and Democracy"
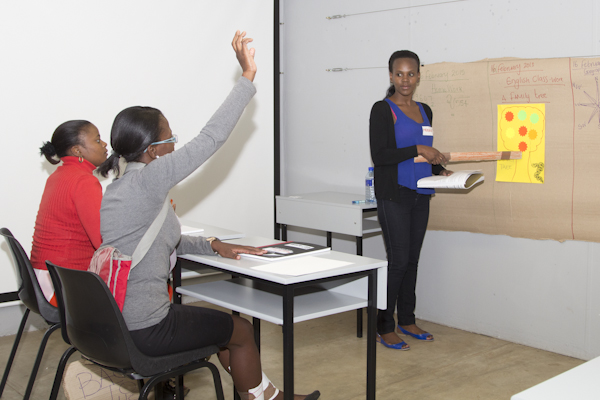
Photo Credit Mandisa Buthelezi
David Golblatt says of 'structures':  "For as long as building or structures is, it may "tell" something of the needs, imperatives and values of those who put it there, of those who use it, and of the ideologies upon which their beliefs and lives may have been contingent ".

Look at what the words in the title of the exhibition mean? Let's unpack the definitions of each word and then regard how they are used in the context of the exhibition alongside DG's personal perspective (resources above). Consider how these words position DG as Documentary Photographer.
  
STRUCTURES (Dictionary definition)
- the arrangement of and relations between the parts or elements of something complex
- the quality of being organized 
- a building or other object constructed from several parts 
- construct or arrange according to a plan; give a pattern or organization to. 


DOMINION (Dictionary definition)
- another term for domination – ownership and control of property
- the power or right of governing and controlling; 
- sovereign authority, a person or group who has supreme power or authority.
- rule; control; domination. 
- a territory, usually of considerable size, in which a single ruler-ship holds sway. lands or domains subject to sovereignty or control

DEMOCRACY (Dictionary definition)
- the practice or principles of social equality 
- straddles two distinct era in our history 
- socially engaged art, highlighting issues of representation and commitment to offering a way of understanding the present because of the past.

Curator Peter McKenzie writes: "This kind of art entails a priori of understanding of certain political acts which justify the image as art... We live in the landscape of apartheid, both part and apart. As much as we are blinkered to the illusion of a past through the deeply divided experience of SA’s.  Socially Politically and culturally the past like a spectre reaches into the present and in its long reach debilitates all attempts at any kind of the illusive notion of social cohesion... these visual images arecontemporary visual vernaculars whos voive interface, comment and catalyse a possibility of understanding the present "


Now think about the following and discuss your thoughts as a group:
  • Why did David Goldblatt make these photographs?
  • What are his beliefs?
  • What is his message?
  • What is his social intention?
 

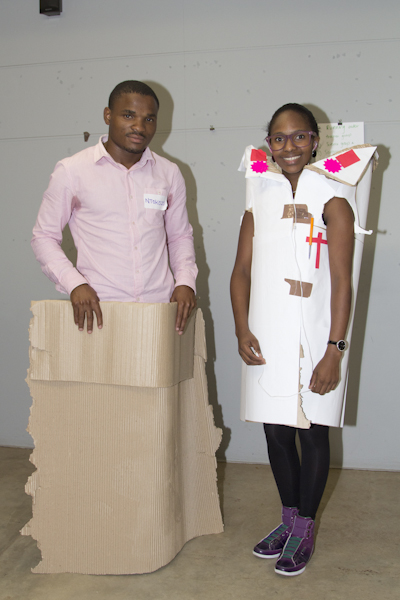
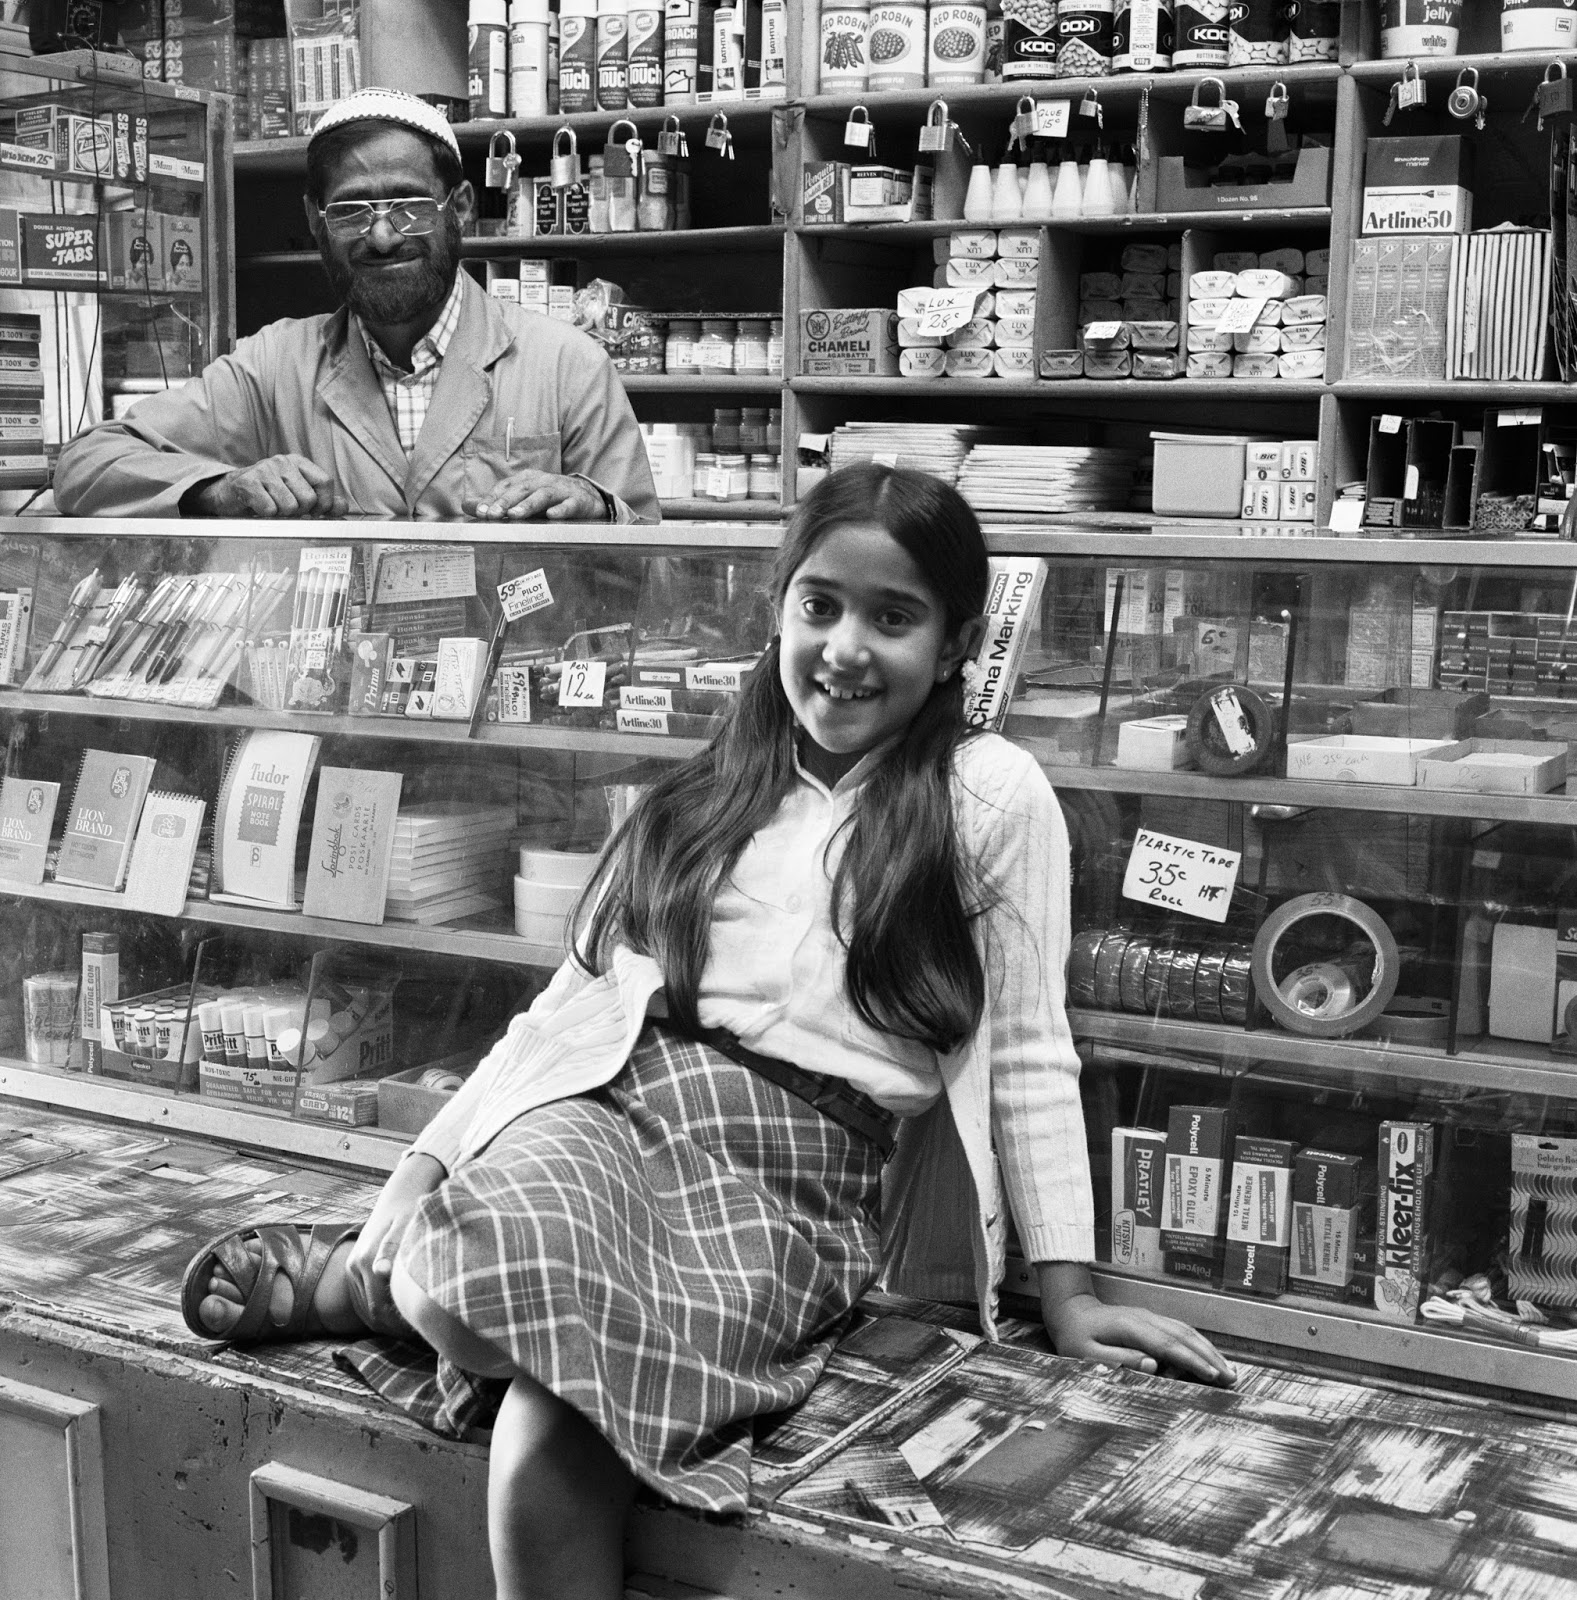
Screenshot from video: Conversations with David GoldblattPhoto Credit: Mandisa Buthelezi.
  
STEP 4:  
Re-look, re-consider and re-read.

You have been given more “clues” in step 3 to help you understand the context of the photograph and the photographers "eye". Now that you know more … will you see more?

Re-look at the photographs… re-think... re-visit...re-consider... re-read...

Draw new conclusions,  apply new knowledge to new situations,
make more informed observations. Focus now on what do you think the photographer wants you to see, regard and imagine now that you know more? DESCRIBE + ANALYSE + INTERPRET the photographs again through a set of new questions posed, that go beyond the collection of personal facts. Click on the links below (Photographs_1-6) to go to the pdf documents in Google Drive, and then answer the questions in the pdf documents.

 Photograph_1: click here


Photograph_2: click here
 

Photograph_3: click here


  Photograph_4: click here

  Photograph_5: click here


  Photograph_6: click here


Thank-you for taking the time to engage this module and the Photographer's work.
This Visual Literacy educational module is developed for the KZNSA Social Art Program 2014/2015.


Thank-you to:


Tuesday 9 June 2015

#HappyInSchool Project

“#HappyInSchool” is a project and exhibition that works with grade eight learners in seven secondary schools in Umlazi, KwaMashu, Verulam and Tongaat, Durban. The project engages with these learners by partnering with educational NGO OneVoiceSA. (OVSA). Central to the exhibition is the question “What will make me happy in the future?” Through a series of participatory workshops the learners and OVSA facilitators explore visualisations of a ‘happy’ future through the technique of image theatre. Groups of learners create dramatized images using improvised props and costumes to depict their dreams and aspirations.

PROJECT AIM
The project sets out to highlight the importance of young people having a voice as an instrument for change; and a means to explore issues of human rights, gender equity, cultural diversity and specifically, nation building. In all of the workshops and activities, young people’s practice of rights and responsibilities is highlighted to support them in becoming active participants in the realisation of these rights. Young people need to be recognised as active rights holders, who have the capacity to become full and responsible citizens. Youth engagement on health and lifestyle issues, now and in the future, is vitally important for South Africa at this stage in its democracy.

Project Objectives: 
  • To promote meaningful participation and transformation by young people in making informed decisions about their health, lifestyles and rights within their communities; as well as playing a meaningful role in educating their peers on their rights and responsibilities.
  • To provide a platform for young people that supports the activation of their voices and addresses their concerns, so that they can lead by example; investing in the next generation, who in turn, will be skilled and able to support sustainable change over time (incubation).
  • To support young people on being heard and having their words advocate, influence and shape their futures, and those of their peers.

Photography Project

The Happy in School Photography Project involves learners creating images of what they think their own happy futures might look like, and these images being captured by a  photographer. The project has three processes:
1: A workshop with learners that focuses on their idea of happiness and envisioning their future happiness.
2:  A workshop with learners preparing for a photo shoot that captures images of their imagined happy future.
3: A photoshoot with the learners.  


Workshop One
Purpose of the workshop:  To encourage learners to think about what makes them happy now, and what they think would make them happy in the future.
Workshop duration:  45 minutes.
Workshop objectives: 
·         Learners will identify what makes them happy.
·         Learners will imagine what career or situation might make them happy in ten years time.
·         Learners will translate these ideas into goals for themselves.
·         Learners will identify steps to help them reach their goals. 
·         Learners will reflect on how this activity has made them feel. 
Resources required:
·         CD player / cell-phone with speakers.
·         A download of the song “Happy” by Pharrel Williams.
·         Paper and pens for each learner to write down their goals.
·         Coloured paper squares for learners to use for the reflection exercise.
Workshop process:
Step 1:  Introduction and warm-up (10 minutes)
1: Introduce the workshop by explaining that in this session you will be focusing on happiness and for each person to think about their own future happiness and setting goals to reach that happy future.
2:  If it is possible, ask the learners to come together at the front of the room to make a circle.  If not, then they will stand behind their desks for this exercise.  Explain that you will play a song, and that everybody should respond with their bodies to how the song makes them feel. They can move and dance around however they want to.
3: Ask the learners to close their eyes, or turn away from each other in the circle.  Play the song “Happy” by Pharrel Williams on your cell-phone or CD player.  Make sure it is loud enough for everybody to hear.
4: When the song is finished, invite learners to say how they feel.  Not every person needs to comment; only those who wish to say something.
5: Point out to the group that one of the lines in the song says “Clap along if you know what happiness is to you”.  Say that for every individual, the things that make us happy are unique.  Ask the learners to speak to the person next to them and to tell them what makes them happy.  
Step 2: Group work (20 minutes)
1: Divide the class so that learners are in groups of four or five people. 
2: Explain to the group that what makes us happy now might be different in the future.  Ask them to talk in their group about what each person sees themselves doing in ten years time, what work or career they think will make them happy.
3:  Give the group five minutes to talk, and then explain that you would like them to create images that show what job they imagine they will be doing that makes them happy. Explain that these images should be still, like a photograph, and there should be no moving or talking in the image.
4: Allows the groups just five minutes to discuss this and to practice making these images.  They should have an image in mind for each person in the group.
5: In turn, ask each group to come to the front of the room to show the images.  This will be like a photographic exhibition, where the rest of the class looks at the images they have created and interprets them. Explain that you will count them down, counting 5,4,3,2,1... and they should then freeze in the image.  They should remain frozen in that image while the rest of the class guesses what they are doing.  Allow ten minutes for this “showing” of the images.  If the group is very big, then not every person will show their image.
Step 3:  Individual work (10 minutes)
1: Explain to the class that having dreams for our own happy futures is important.  However, we need to have a plan to reach these goals, so they are not just dreams, but are a realistic future that we can aim for. 
2: Give each learner a piece of paper and pen and ask them to write down the steps that they think they need to take to reach these future career goals for themselves. 
3: Remind the learners that we each have our own journeys, and if we want to reach our goals we need to plan ahead and know what steps to take to reach these goals.  Remind them that sometimes we might get distracted from our goals, but writing them down and sharing them with people we trust can help us to keep focused and get the support we need to make the best decisions to reach these goals.
4: If time allows, learners can share the steps they have set to reach their goals with each other, or with the whole class.
Step 4:  Reflection and closure (5 minutes)
1: Give each learner a coloured square of paper and pen and ask them to write down a few words or make a quick drawing of how they feel after doing this exercise.  
2: Explain that One Voice is working on a project that encourages young people to imagine their own happy futures, and explain that their class has been chosen to participate in a project that photographs learners for an exhibition of photos that shows what they imagine their own futures to be like.  Explain to the learners that they will start to prepare for these photographs in the next session.
3: Also explain that you will be collecting the coloured squares for use in the exhibition and for reporting on the project.

Workshop Two
Purpose of the workshop:  To prepare learners for the photo shoot for the exhibition. 
Workshop duration:  45 minutes.
Workshop objectives: 
·         Learners will make decisions about who will be photographed for the exhibition.
·         Learners will create props and costumes for use in the photo shoot.
·         Learners will reflect on how this activity has made them feel. 
Resources required:
·         Large sheets of paper.
·         Coloured pens and paints.
·         Scissors and tape.
·         At least 10 pictures from magazines that show ‘sets’ for photo-shoots.
·         Coloured paper squares for learners to use for the reflection exercise.
Workshop process:
Step 1:  Introduction and warm-up (10 minutes)
1: Introduce the workshop by reminding learners that in the previous workshop we focused on imagining a happy future for ourselves.  Explain that in this workshop we will continue to think about our futures, and will start to prepare for the photo shoot. 
2:  If it is possible, ask the learners to come together at the front of the room to make a circle.  If not, then they will stand behind their desks for this exercise. 
3: Start a rhythm, with words: 
×          Hey Jingle,                                          (They repeat after you)
×          Do you jingle?                                    (They repeat after you)
×          Hey Jingle,                                          (They repeat after you)
×          Do you jingle?                                    (They repeat after you)
×          And this is how I jingle...                   (You do a movement)
×          And this is how I jingle...                   (They copy your movement)
After a few rounds of this, ask the learners to connect a movement with their chosen future/career that they talked about last week.  Each learner then takes a chance to show us “how they jingle” with a movement associated with their dream job that will make them happy.
Step 2: Group work (30 minutes)
1: Divide the class so that learners are in groups that are related to what they have seen themselves doing in ten years time. 
2: Explain to the groups that they need to consider how they might set up a photograph that shows them as they might look in their future.  Pass around the sample photographs so that they can take a look at these.  Talk about what they see in these photographs, how colour and composition is as important as the model.  The background, set and props all tell a story that allow the viewer to get a clearer picture of the life of the person in the photo. 
3:  Explain to the groups that they will be responsible for creating these sets, props and costumes for the photo shoot that will take place, and that they will start to build these today.  Ask the groups to decide who will be in the photos.  Will these be individual portraits or group photos?  Not every person needs to be in the photos, some may prefer to help build the props and costumes.   Each group will need to talk and make decisions about what set (background), costume or props they want to use to show who they want to be. 
4: Give the groups materials to start to create the look that they want for their photos.  Explain that they can also use objects that they find around the school (or home) for the shoot.  Stress that they should not buy anything for this.
5: Walk around the room and give assistance where needed.   Remind the groups of the importance of colour and composition, that their images must be clear to an outside viewer, and should be interesting to look at. 
6: After 30 minutes, explain to the group that they will need to continue creating their sets, props and costumes on their own, and that these should be ready by your next visit.
Step 3:  Reflection and closure (5 minutes)
1: Give each learner a coloured square of paper and pen and ask them to write down a few words or make a quick drawing of how they feel after doing this exercise.   Explain that these squares will be collected and used as part of the exhibition.
2: Explain that the official project photographer will be visiting the school in the next session, and that they should be ready to be photographed. 


The Photo Shoot
A time and venue need to be agreed on with the school. It is better that an outdoor venue is used, but there should be an indoor venue available in case of rain on the day.  The main set-up place needs to be a bit away from the buildings, in full sun – not under a tree or under a roof, as shadows will affect the photos. 

Before the photo-shoot:
Learners will need to be reminded about bringing what they need to the photo shoot the day before the shoot.
You will need to develop a running order for the photo-shoot.  A running order is a list of what will happen and in what order.  This might look as follows:
Setup 1: Group shot of the scientists group
Setup 2: Individual photos of the scientists
Setup 3: Group shot of the teacher groups
Setup 4: Individual photos of the scientists
Setup 5: Group shot of the mothers
Setup 6: Individual photos of the mothers
Setup 7:  Placard photos of individuals.

Process on the day:
On the day of the photshoot – you could ask some of the learners to help as your assistants, helping set up the scenes needed, and lining up the next group required in the running order. 

On the day of the shoot, make sure that you have thick black marker pens and enough white card for each person to write the answer to the question:  “What will make me happy in the future”.  They should not write the question, just the answer ... Eg: “Having a BMW” or “Being a doctor”.   They might be photographed with these placards.  The placards will be collected and used in the exhibition.